
Workshop for teachers
- Preparation of the workshop
- Preparation of the attendees
- First workshop
- Homework
- Second Workshop
- After work and evaluation
The whole of the workshop description below is also available for download here. The download also includes the additional documents that are also linked in the text below. These are:
Preparation of the workshop
B1 – Template to collect piloting schedule and plan This workshop is designed for teachers or curriculum experts and others to complete a workshop for other educators (teachers etc).
The first thing is for you to decide which AutoSTEM automata you want to introduce during your workshop. This should be dependent on the attendees that you expect and what you want them to use with their students. The decision may be based on a particular STEM topic that you want to introduce and the introduction in the online course will help you understand which is most appropriate for you. In our experience, it is best to use one of the simpler automata in an online workshop, especially if this is your, or the attendees, first go.
Once you have defined which automata you want to use, you should go to the appropriate page on the AutoSTEM website and download any available documentation, and view any videos available. You might want to make a note of the URL (web link) addresses to the page, documents and videos as you will need to use some of the material in the workshop, For your information, on the AutoSTEM website, all the automata are listed in this page.
You should also prepare for the timescale of the workshop that should happen over the course of 3 weeks or so. The actual time spent working on the tasks will be a lot less, of course. In Table 1 below we detail the timings. You should of course inform your attendees of the dates of your workshop and timings before it commences.
The optimum number of attendees is between 5 to 10 in one session of the workshop, as it is difficult to manage the feedback and interaction with more.
You should prepare and be familiar with the webinar app you have chosen to use, and have decided on and setup a file sharing space or method for attendees to send you their videos, images or/and files.
| Attendee Activity | Preparation | Workshop 1 | Homework | Workshop 2 | Reflection and feedback |
|---|---|---|---|---|---|
| When | One week before workshop 1 | Over the course of the week between workshop 1 and 2 | One week after workshop 1 | About 2 days after workshop 2 | |
| Time required | 1 to 1.5 hours | 60 to 90 minutes | 2 to 3 hours | The time will vary depending on how many participants. You should allow 5 minutes per participant and 15 minutes for yourself. | 20 to 30 minutes |
Preparation of the attendees
Once the tutor/teacher is prepared then the next step is to prepare your students. This should take place about 1 week before the date of the first workshop to allow the attendees’ time to prepare. You can send your attendees a ‘Workshop preparation document’, we have an example here. You will find the information you need to supply the attendees within this list:
- Weblinks to documents and videos so that they can view and read about the automata they are going to make
- A brief introduction
- A list of materials and tools they will need and how they can obtain them
Weblinks – you should locate the teacher guide from the AutoSTEM website, these are available in the 5 project languages. These are suitable for teachers as they have been written to give full guidance to teachers on the particular automata. The videos to your chosen automata will also be found on the same page. You will need to copy the web link address of the document and the videos.
A list of materials and tools required – you will find these details in the teacher guides that you have already downloaded. All the materials are commonly found in primary and kindergarten classrooms.
You will see in the example, linked above, how the important information and links have been copied in to the ‘Workshop preparation document’.
It is also helpful to offer the attendees a Q&A email address to answer any queries they may have, as this will make your first workshop run more smoothly.
First workshop
The purpose of the first workshop is to introduce the project and the workshops and to set the agenda of the rest of the online workshops. The workshop is divided into phases; each phase is separated in to the technical aspects and the activity.
Phase 1: Introduction
Technical: Ensure all attendees are connected and have visual and audio input and output. The webcam should be focused on the head and shoulders of the tutor, who should be well lit (Standard setup). It is best to use a headset microphone and speakers as this will allow the tutor to move around a little and still transmit good audio quality.
As a rule, it is good practice for attendees to ‘mute’ their mikes when not speaking to reduce any extraneous noise.
Activity: The tutor should introduce themselves and run through what will happen in the workshop, It is a good time to ask attendees if they have any problems in preparing themselves according to the ‘Workshop preparation document’. Attendees should then identify themselves to the group.
It might be helpful to read out the goal of the AutoSTEM project and brief details, if appropriate:
AutoSTEM is a large-scale Erasmus plus project with 6 partners from across Europe. The project is using simple automata to introduce STEM subjects to young learners using a multidisciplinary approach which introduces concepts and competences in different subject areas at the same time, including, measurement, transfer of power, mechanics, numbers, creativity and comprehension.
Phase 2: Introducing the materials
Technical: the webcam should now be on the stage, (stage setup) the stage is the area that is being shown to the camera – in this case, the desk area where the materials are and where the automata will be constructed. It is very useful to do a rehearsal of this step to ensure that the attendees can easily see what you are doing. You could test this with a colleague who can watch your rehearsal and give you feedback. Problems can arise if the camera is too close to the stage, or too far. If too close then parts of the construction may fall outside of the cameras view, if too far, then attendees may have problems seeing in the detail necessary
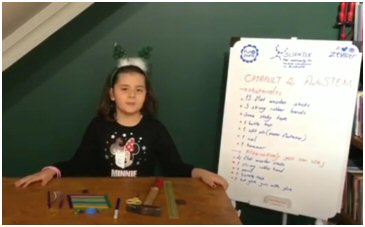
Activity: The tutor should then introduce the materials and the final automata that you are going to make. It is helpful to hold up each item and tool so that attendees can ensure they know the names for each item.
Phase 3: Building the automata
Technical: Continue with the stage setup used in Phase 2.
Activity: Making the automata (feedback from attendees). The tutor builds the automata and the attendees copy and make their own at the same time. This should be a step by step process with the tutor ensuring that the attendees are following and managing their own construction. During the construction process the tutor should also talk about the STEM aspects, the mathematics and science, related to the building process. You will find details on these in the automata step by step guide that you downloaded in the preparation of the workshop phase, above.
After you have made the automata, it is nice if the attendees take it in turns to holds theirs up to their camera, so everyone can offer feedback and compliment them, if appropriate.
Phase 4: Interacting and analysing
Technical: The tutor can now return to the standard setting for the webcam used in Phase 1 focusing on their head and shoulders
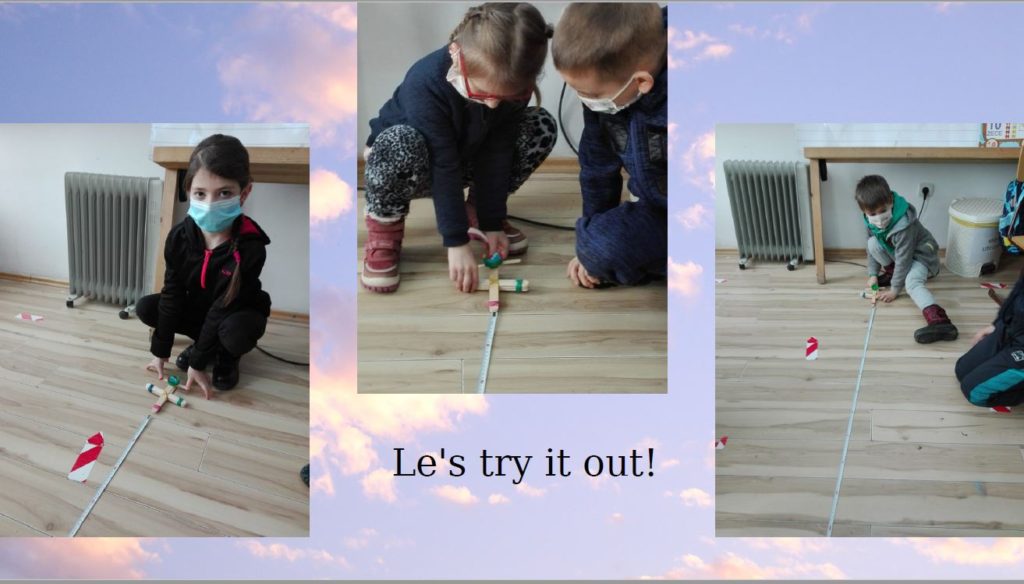
Activity: In this phase the tutor should ask the attendees for their input. You can start by telling them to try out and play with their automata. They could test their ideas and ideas.
The next step is to make the attendees think about what they could do with their automata and share ideas and inspiration with other attendees.
They should be asked to reflect on the questions:
- How is the automata related to your curriculum?
- What learning goals can you reach with the automata?
- Which learning activities can you to carry out with the automata?
- How would you structure a lesson with the automata?
In the final part of this phase you should ask the attendees to present their ideas. The best strategy is to ask each attendee in turn. And after each person you can ask the others for their thoughts on their ideas. You could also ask the attendees to make their suggestions in the webinar chat or in a digital interactive whiteboard like Google’s Jamboard
Phase 5: Setting the Homework
Technical: The tutor can stay with the standard setup. You can also put up an adapted presentation page (it could be Powerpoint or a Word.doc). We have included the text below in a one-page presentation here.
Activity: Having the ideas and input from the attendees you are now ready to set the homework, It is useful to show the text below to the attendees and perhaps, if it is possible in your webinar app to send them presentation page that is linked in the previous paragraph.
The homework: Your automata in your classroom:
- Plan a maths or science lesson for your classroom using your automata
(children building an automaton and/or children using an automaton)- You decide about the learning goals, the timeframe if the children shall work
- individually or in groups, …
- This should be in line with the way you normally work in your classroom. Do not introduce too many new things at a time.
- Undertake the planned lesson in your classroom
- Reflect on the lesson
- Did the children reach the learning goals? Why/why not?
- What went well? What was difficult to carry out?
- Did the children enjoy the lesson? Why/why not?
- Are you satisfied with the outcomes? Why/why not?
- Present your experiences at the next workshop
This is the moment when any attendees that have particular problems or needs in completing the homework should ask. It is often a good idea to ask all the attendees to offer solutions and ideas to help overcome any problem.
It is a good idea to suggest that attendees take photos and videos of their students and prepare answers to the 4 questions listed above as they will be asked to present them at the second workshop. You can advise attendees to name any files they share with their name so they can more easily be identified and again ensure that the attendees know where and how they can share files with you.
If there are no further questions it is time to close the first workshop in a customary manner.
Homework
The attendees instruct their students to complete the homework as a school or home project and record with photos and videos the results. The workshops with the children can be online or face to face. It is important that Parental permission is obtained if you want to show images of the children’s faces according to the rules in your institution. A Parental Permission form is included in the AutoSTEM resource pack here.
It is advisable to share the below with your attendees:
Attendees should allow themselves time to prepare the materials to build the automata and what learning goals they want to achieve. It might be helpful to include ideas shared in Workshop 1 or try out your or their AutoSTEM ideas.
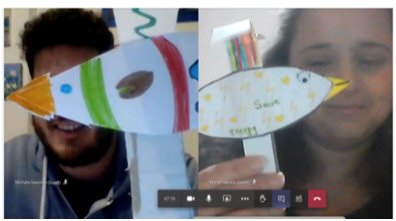
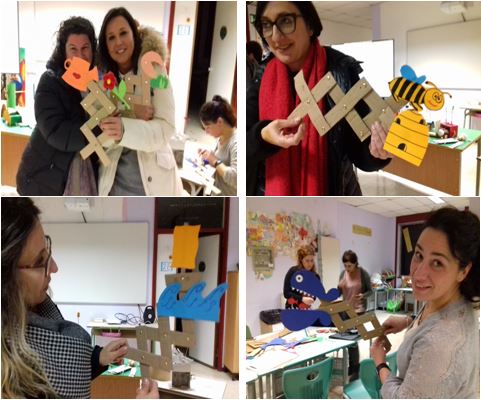
Below we show some examples of teachers work with their students for their homework in previous online workshops.
There are some key advisories for Face to face workshops the project has gained from experience:
Do not include too many children in one session, generally the younger the children the smaller number that should be included.
Allow enough time for the entire project and it should include 5 phases:
- Preparation of the children including a discussion with them
- Making the automata
- Using the automata
- Free play, it is important to remember the automata are toys, it is the reason the project is very motivating
- Reflection on what we have learnt and enjoyed
They should also allow themselves some time for using their cameras and uploading their results to the provided space. By uploading to the shared space you should assume that Parental permission has been given for any images than include identifiable children.
Second workshop
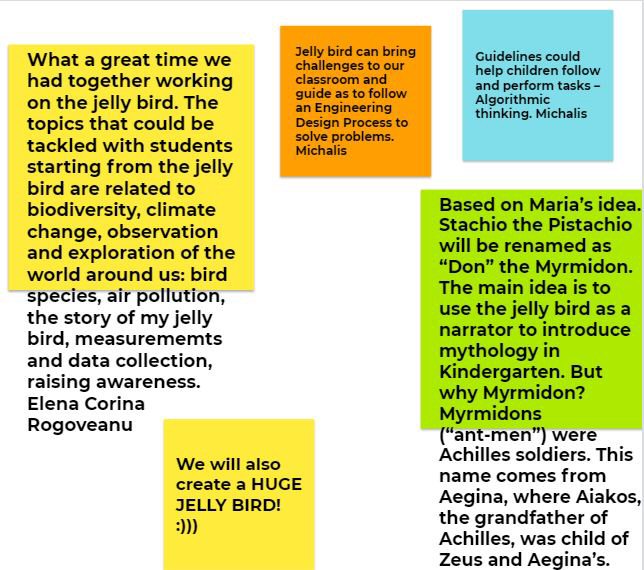
The second workshop is designed to look at what attendees have achieved in their homework, to share their successes, problems, ideas and suggestions. The most interesting aspects that the project team have discovered from running online workshops are:
1.Improvements to the design of the automata
2.New varieties of automata, some based on the existing designs and some completely new.
3.New ideas of how the automata can be used in the curriculum
The tutor should have looked at the online shared space before the workshop and downloaded any images or videos for sharing with everyone. Be careful to assign them to the correct attendee.
Phase 1:
Technical: As in the first workshop the tutor should have the webcam on their head and shoulders and using a headset, with a mike and speakers, is advisable (Standard setup). You should also be sure that attendees can also be seen and heard before moving on in to the workshop, especially when doing their individual reports.
Sharing recordings: it is a good idea to provide an online space where attendees can upload images, videos and presentations of their homework as these will be very helpful, in a very visual project for others to see and understand what others have done. The tutor can set up online storage space. The link has a presentation on a number of reliable and popular file-sharing options.
You will then need to give the link and access to your attendees so that they can upload it to your reserved space.
Activity: Attendees presenting their homework
This is the major phase of this workshop. Attendees should take it in turns to talk and show what they have accomplished in their homework. It is helpful if they include answers to the below, as these will give context for the other teachers when they present:
- How many children?
- How old were the children?
- How long it took?
- What was the theme (if there was one)?
- How much autonomy did they need?
- Were there any special needs?
They should also answer the questions posed in workshop one homework text, repeated here:
- Did the students reach the learning goals?
- What went well?
- What was difficult to carry out?
- Did the students enjoy the lesson?
- Are you satisfied with the outcomes?
The attendees may wish to share images, videos, presentations from their homework that they have added to the shared online space. You should be ready with the images to show from your desktop.
All attendees should take it in turn to report.
Phase 2
Technical: Standard setup
Activity: In this phase attendees should examine, compare, analyse and suggest based on the reports from each other in Phase one. These could look at:
- Background
- Challenges and achievements
- Overall result
- Discussion of all
- Additional ideas
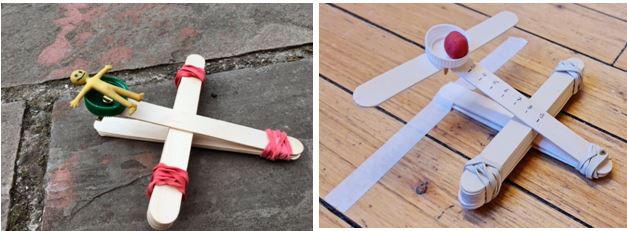
In project run workshops teachers have offered numerous improvements and additional curriculum ideas that have been included in the project. Below we show some ideas from teachers in Italy (Figure 2) and suggestions to improve the mathematical possibilities of the catapult (Figure 3.).
After this discussion it is useful to offer the attendees the opportunity to complete an evaluation and reflection on the workshop and the final section, below, suggests how you can complete this. The feedback obtained will help you evaluate the workshop and improve if necessary. You should now finish the workshop in the customary fashion.
After work and evaluation
It is always helpful to carry out a reflection on our work, and we have supplied a questionnaire that you can send to your attendees after the workshop to get feedback.
You will find the questionnaire here. The questionnaire should be returned to you at a pre-provided email address or uploaded to the shared online space.